There are plenty of tutorials showing how to enable Pinterest rich pins on WordPress with the Yoast plugin. Learn how to do the same thing with SEOPress (my favorite SEO plugin for WordPress) in this quick tutorial.
The process for enabling rich pins with SEOPress is very simple – in fact, you'll probably be set to apply for rich pins as soon as you install the plugin! I didn't know that before trying it myself, seeing as I couldn't find any tutorials online… which is why I made this one!
How to enable rich pins on WordPress
The gist of all the “Yoast” tutorials I saw was that all you really needed in order to validate and apply for rich pins was to enable Open Graph data (OG data).
I suspected this could be done using most if not any SEO plugins, and so I poked around SEOPress to see if I could do this there.
How to set up rich pins with the SEOPress plugin
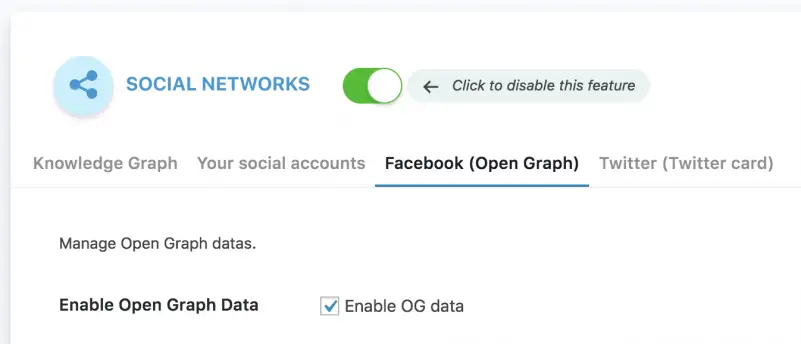
I found the OG data option in SEOPress by navigating here in my WordPress dashboard:
Dashboard > SEO > Social Networks > Facebook (Open Graph)
Once there, I realized the OG data box was already checked by default when the plugin is installed, so I didn't actually have to do anything else with SEOpress! (If you're trying to do this you should still check to make sure this option is enabled).
Since I assumed that was all I needed to validate a pin, the next step was to test it out with the Pinterest validator.
How to test a pin with the Pinterest validator
To test whether Pinterest can receive your rich pin data, go to https://developers.pinterest.com/tools/url-debugger/ and enter the

If it worked, the info from your post should have been pulled in! Scroll down to make sure the info looks right, and then click to Apply for rich pins!
NOTE: You can update the info that's showing on a pin later, you just want to make sure info is being pulled in correctly right now!
How will I know when I've been approved for rich pins?
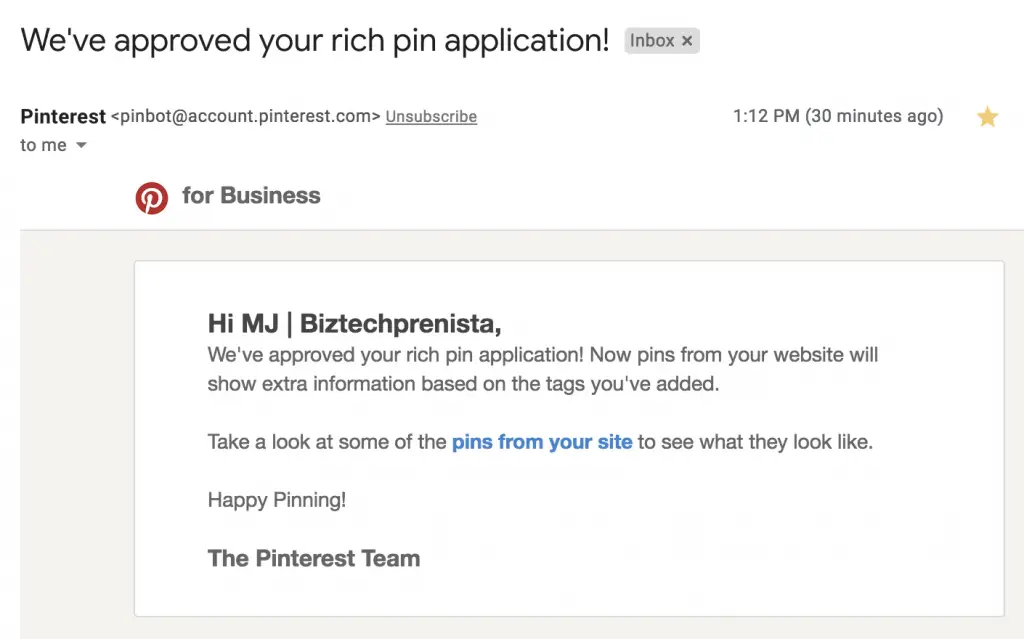
Pinterest will send you an email when you've bee approved, or if they have some questions for you first. This process can take a little time so don't be alarmed if you don't hear back for a day or so.
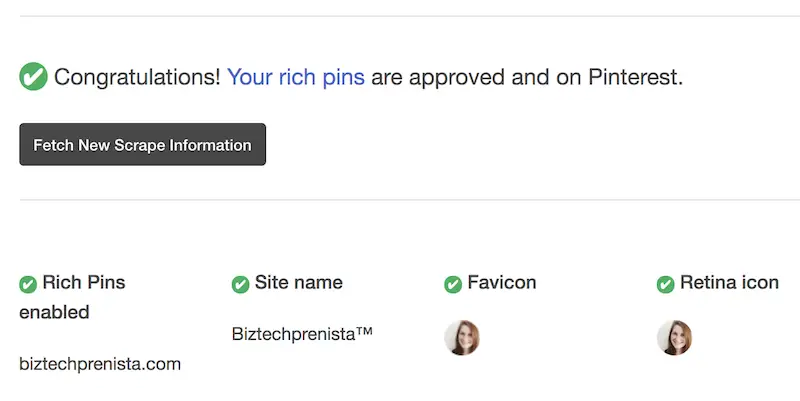
Thankfully, my
Here's what my “acceptance” email looked like 😉
Will the rich pin info show up on my current pins?
Once your website is verified with Pinterest and you're approved for rich pins, YES!! Any pins you've already pinned (or other people have pinned) from your domain will now show rich pin info! Yay!! (Update: an exception to this might be if you've manually added a custom title to a pin on Pinterest, either by uploading a pin or editing a pin to add a title. However, if that pin gets re-pinned the rich pin title will likely show up on the re-pinned version… confusing I know!)
As soon as I clicked that link in the email shown above, I could see the most recent pins from my domain with the rich pin info!
And, I could see that I needed to clean some of them up… yikes!
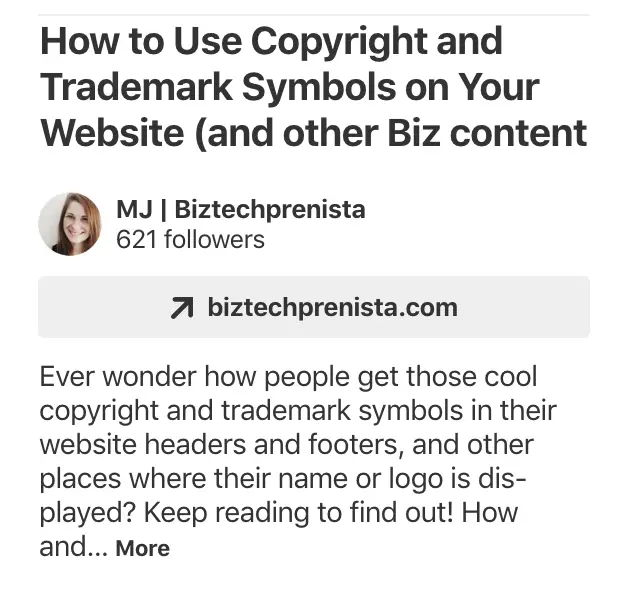
Example of a published pin before and after rich pins:
Before enabling rich pins, I had this one post that for some reason kept posting without the description when it was shared. The original pin had description text, but whenever I rescheduled it to Tailwind, or someone else tried to share it, it would be posted with NO text.
The same thing kept happening even for completely new pin images or descriptions I made for the same post. It was driving me nuts!
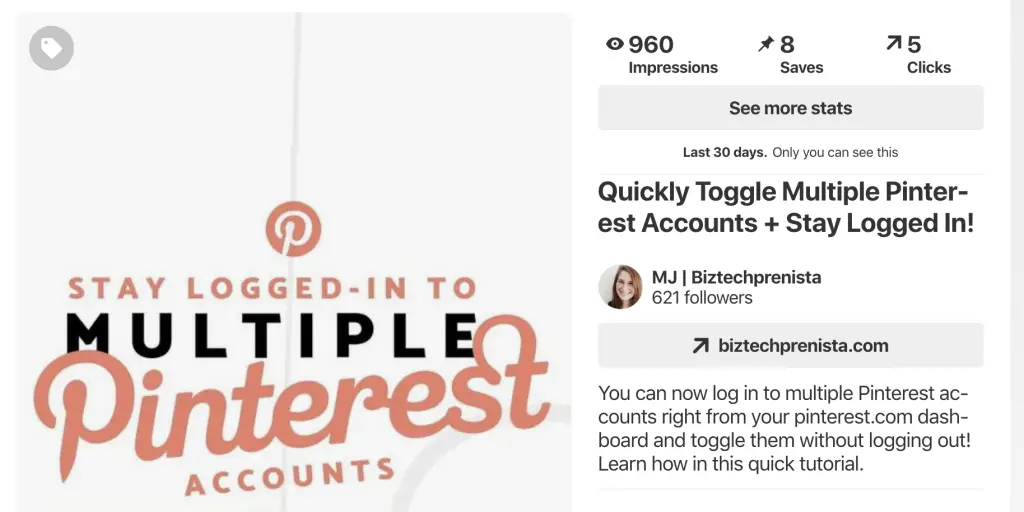
The pin shown below had been previously pinned by someone else without the description, and so no text would show in their feed under the pin or beside the pin when you clicked on it. But as soon as I enabled rich pins, the bolded title and description below my URL button were pulled in from biztechprenista.com! And the same happened for all pins pointing to that post! Whew!
How can I edit the text that shows on a rich pin?
You can easily change your SEO title and description inside of SEOPress or another SEO plugin. But before we look at how to edit the text that shows up on your rich pin, let's quickly break down where each piece of text is coming from.
Where does rich pin text come from?
*UPDATE: When I first wrote this post, the Pinterest title seemed to be pulling from the title I put into SEOPress — which was the same title that should show up on Google. However, now it seems that my BLOG POST TITLE is being pulled by Pinterest. Just something to note if you like to sometimes make your blog post title different than your Google title like I do. If you do make your post titles and meta titles different, be sure to verify which is actually being pulled by Pinterest for you!
Both the bolded title and description text below the
Note that the word “description” can get confusing… the description text that someone fills in when they repin something on Pinterest, or the description text you might put into Tailwind are NOT the same as rich pin description text.
Also note that if you haven't specified a particular Meta Title and Description, most likely your blog post title and first couple lines of text in your post will be pulled. If you're using a custom excerpt, that may be pulled for the meta description instead.
Therefore, if you don't want to mess with meta title and descriptions you could just try changing your blog post title (but NOT the
The rich pin description comes from YOUR site and remains the same across all pins pointing to a particular post. It doesn't matter if the pin was pinned from your site, uploaded via Pinterest, Tailwind, or another scheduler, or if you're using a different image and pin description. Any pin that points to the same
The description you or someone else fills in when pinning or repinning acts more like a comment, and can be different across all version of the pin (while the rich pin description will remain the same). To recap:
- Rich Pin Title (in bold) = SEO Meta Title (or might be post title – double check!)
- Rich Pin Description (below url button) = SEO Meta Description
- Description (below [pinner] saved to…) = Dependent on Pinner
Example of rich pin text to be changed!
If you don't set a custom meta title and meta description, by default your blog post title will show up as the bolded text, and the first few lines of text in your post will show up as the description text (if you're using a custom excerpt, that text may show up as the description text instead).
For example, here's a pin pulling in my blog post title and some default text at the beginning of my post. It's not so pretty and the text is getting cut off on both the title and description, so I want to change it!
Editing a rich pin's title and description (and Google search preview) in SEOPress
Changing the SEO meta title and description in SEOPress is easy!
If you've already got the plugin installed and activated, all you have to do is go to the post you want
Here's what's showing for the post I want to edit:
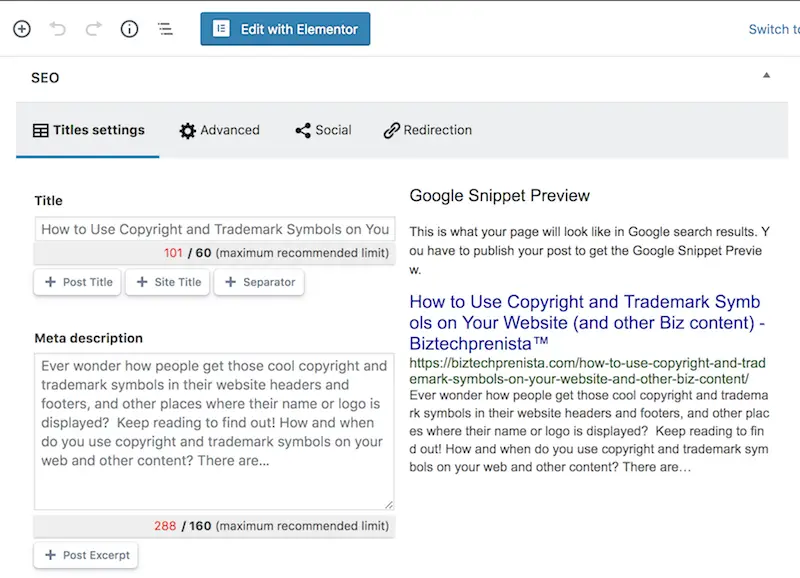
Eeek… no wonder the pin looks bad! The title is too long, the description is too long, and they're both getting cut off! And even though the title is showing in the preview, it would likely get cut off in Google as well, hence the recommended 60 characters.
Changing the Post Meta Title
First, I want to edit the meta title to be under or close to 60 characters. Of course, I don't want to cut out anything important from the title, but if it's too long it won't show in search or on my pin anyway!
Note: Changing your meta title won't affect your blog post title as it's shown on your site. You can change your post title to match your meta title, or you can make them completely different if you like. Just make sure they're not so different as to be misleading (no clickbait). ALSO note that Pinterest might pull the blog post title instead of the meta title as it does for me now, so be sure to double check if you want to experiment with making these different!
Changing the Post Meta Description
Next, I want to set the meta description as something short and well, descriptive of the post. Hopefully a little enticing too! Since it will likely get cut off after 160 characters in Google, I want to aim for 160 characters or less.
Tip: If you use custom excerpts, you can use that + Post Excerpt button to pop your excerpt text into the meta description box!
Now, here's my updated SEOPress preview:
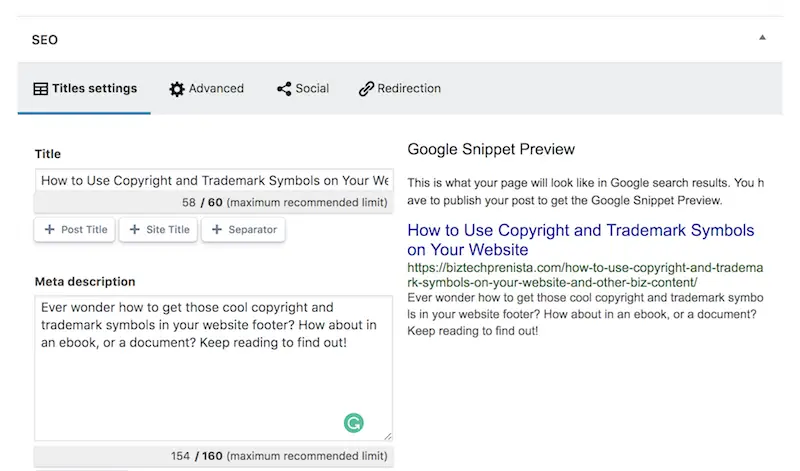
Nothing spectacular, but that's much better! At least everything is unlikely to get cut off in search results, and I can always change it again later 😉
But we're not done yet!
Now my post
How to update rich pin text with the pinterest validator
To update my rich pin text (get it synced up with my updated
Now there should be a Fetch New Scrape Information button. Push it!
It took a couple minutes for my pin info to refresh (but don't be alarmed if it takes longer).
Here's how it looked after:
That's It!
I hope you found this post helpful, and if you haven't already I encourage you to check out SEOPress!
I'm off to go fix some more of my wonky rich pin text! 😉